Sunday, June 30, 2013

New Light Fixture and Tips for Selecting Your New Light


The Problem
 
 
An OLD and VERY outdated BRASS light fixture that always got on my nerves needed to be changed out.
 
It took FOUR light bulbs and I swear it looked like something out of a 1980s Montgomery Ward catalog!!! I hated it and the time had FINALLY come to upgrade!


Exterior Light


The Solution
 
A nice, NEW light fixture with a black finish, and NO BRASS anywhere to be found!


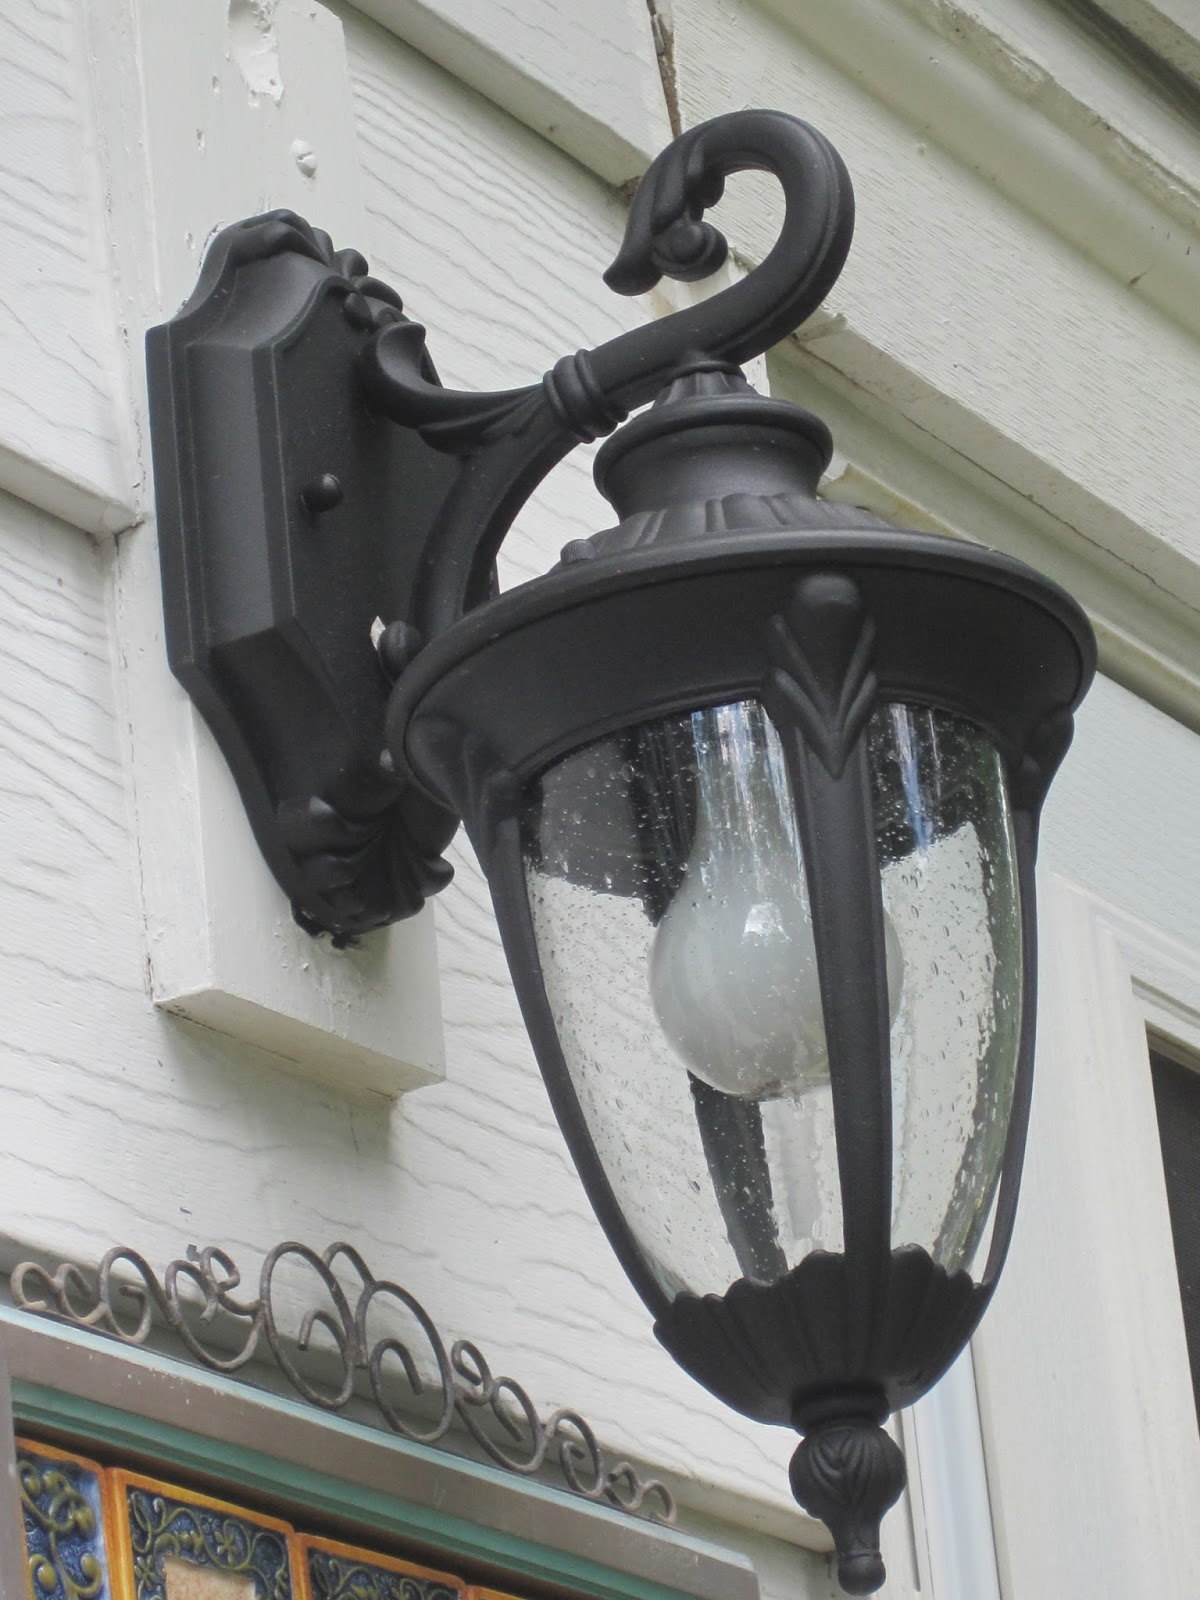
With GORGEOUS seeded glass........


And it only takes ONE light bulb!!!! Who knew?!?! LOL


And there they are,
 
Side by side,
 
Before and After.


Pin It


I just love seeing my new fixture when I pull up to the house because it makes such a difference in how the porch looks!
 
A new light fixture can totally change the look of your room or porch.
 
 
It had been a while since I shopped or new light fixtures, and I can tell you that it was a bit overwhelming at first.
 
There are SO many different styles and colors to chose from  so I had to make myself a list to help me narrow down which fixture would work best for my house, and I wanted to share it with you.  


When selecting a new exterior light fixture for a porch, consider these things:
 
 
Placement and style of the fixture-
How high will it be hung, and will it hang in your visitors eyes and be too bright? How many and what type of bulbs does it require? (lots of bulbs means too much energy wasted AND costs more to replace the bulbs....ideally I like my fixtures to require only one or two bulbs)
 
Material & Quality-
Is the light fully exposed to the elements? Does the color coordinate/enhance my decor? Will it last for years to come? Is it easy to clean and change the bulb?
(very important thing to consider as some fixtures require you to unscrew several screws to get to the inside, which can make it hard to keep clean, esp in the winter, and change the bulb!)
 
Price-
Is the fixture's price within your budget? Do not get too fancy to the point where you spend too much money and the fixture stands out and looks out of place compared to the rest of your home. (Your new fixture should enhance what is already there and not draw attention to itself alone).
 
 
And there ya have it. This is your check list that you need to take with you when you go shopping for a new light fixture.
 
 
It will make your shopping experience a LOT more enjoyable, I promise! :)
 
 
Have a great week!
 
Jennifer


that diy link partymop it up mondaysEvolution of Style
 
The Dedicated HouseMy Uncommon Slice of SuburbiaProject Inspire{d} Button NewMod Vintage LifeMade in a DayInspiring Creative Moments square

StoneGablePhotobucketSouthern Lovely
http://www.thethriftyhome.comEmbracing Change French Country CottagePrettyThingsbirdsonawirebuttonThe Shabby Nest{nifty button}Natasha In Oz

Reminder-Google Reader ends tonight. Find me on Bloglovin


Just a reminder that the Google reader ends tonight!
 
But don't worry....you can follow me with Bloglovin or thru Linky Tools if you like blog readers, or you can find me on G+ as Jennifer Schmitz, or Decorated Chaos.
 
 
Jennifer
 

Tuesday, June 25, 2013

Dollar Store Urn Makeover


Sssshheeewww! Things are getting hot here in Kansas City lately!
 
Within a week we went from rain and temps in the upper 70s to dry windy weather in the 90s! 
 
Needless to say it is very humid right now, but I am loving every bit of Summer!
 
For those of you who follow me on G+, you may remember seeing these urns I found at the Dolla' Store for a mere $8 bucks.
 
Yes, $8 bucks!


Keep in mind they ARE plastic AND very boring beige, BUT I have plans turn this into something beautiful so in the cart she went.  


 ....and after a few coats of my favorite Oil Rubbed Bronze spray paint,


she now adorns a pretty pink Hydrangea on my patio.


I just love this spray paint. It is an "everything" spray paint so it is good on wood, metal, AND plastic.
 
If you have never use it, I highly recommend trying it.
 
This paint gives off a blackish-brown color with just a little bit of sparkle.
 
And when you paint something plastic like this be sure to give it plenty of time to dry.
 
 I would allow a long afternoon or even over night if you can, just to be sure the paint has dried completely.
 
 
Here is a closer picture of the urn after it was painted.  


Because the urn was plastic, I was worried about it being cheap and not holding up, but I added a layer of small river rocks to the bottom of the urn to give it some weight, then once I added the potting soil and plant it filled out nicely and is very sturdy.


My backyard is partly sunny so the hydrangea made a nice addition to the patio and it will bloom all summer.


And there she is.
An $8 dollar urn that many would pass up just needed a color makeover and a pretty plant to freshen  it up.
 
Pin It 


I just love affordable makeovers like this and I plan on going to get another urn so I can put one on either side of our garage door.  
 
The tip here is to shop the cheaper stores for pieces with the right SHAPE and FORM of your desired look,
 
keeping in mind that ANYTHING can be painted and embellished.
 
So why pay more when you can get the look for less!?!?
 
Have a wonderful week!


Jennifer


Linking Up To These Great Parties:


Home{work} WednesdayYour Whims WednesdayThrifty Homemaking ButtonSouthern Lovely52 MantelsDomestically SpeakingEmbracing Change StoneGablePhotobucketImparting GraceMade in a DayFrench Country Cottagelivelaughlinky 250x250Liz Marie BlogShabbilicious FridayThe Shabby Nest<br><br><br><b>Join us every Friday...</b>Chic on a Shoestring DecoratingBy Stephanie Lynnmop it up mondays
Evolution of StyleThe Dedicated HouseMy Uncommon Slice of SuburbiaProject Inspire{d} Button NewInspiring Creative Moments squareMod Vintage Lifeoutdoor