Thursday, May 29, 2014

Get Your Motor Running.......DIY 15 Minute Lawn Mower Maintenance

 
Recently I noticed my lawn mower was running like crap.
It was eating a lot of gas, sputtering, and making odd noises,
 
so I started calling around to repair shops and found that most repair shops around my area charge around $80-$120 just to do a minor tune up.
 
 
I wasn't sure what was going to be the problem so I decided to try to do some basic maintenance myself
to save some money.
 
So come with me and lets get this baby tuned up to see if it fixes our problem!
 
Now, first things first. We need to understand how a lawnmower works.
 
A lawn mower is just like your car.
 
It needs to be maintenance from time to time in order to keep running its best.
 
Because it runs with a motor it will have the basic components any other motorized item has such as
 oil, spark plug, and need fuel/gas.
 
So after searching online and looking over my lawn mower I discovered it operates with a Briggs and Stratton motor
(lawn mower says this on top)
so I did some research and found this maintenance kit.  
 
It contains everything you need!
One stop shop.
Score!
 
 
About five  years ago Mr.Chaos changed the spark plug so I knew that had been done
 
but I don't recall EVER changing out the air filter. (uh, oh)
 
Since the mower was running sluggishly I thought the air filter was probably the culprit so I started with it first.


Simply locate where your air filter would be.
It is typically not next to where the air blows OUT of the lawn mower,
(since air goes in one side and out the other),
 
 so find this spot first then look
on the OTHER SIDE for your air filter.


Ah, ha! I was right!
When I unscrewed the screw to loosen up the air filter I was shocked to find this!!!!
 
A VERY DIRTY and CLOGGED air filter!
 
No wonder the darn thing was running sluggishly and making weird noises!!!!


Yikes! Look at the old one compared to the new one!


Man that was dirty!


Now, after you get over the fact that your air filter should have been changed years ago,
go ahead and put in the new one.  (like my sarcasm?) :)
 
To do this simply slide the new one in the EXACT same way the old one came out and push it into place.


Screw the cover back on and get ready to change the spark plug next!


To change the spark plug,  simply locate the spark plug wire which should be towards the front of the mower like in the picture below.


The black spark plug wire connects to the spark plug


so simply pull it off so that you can access the spark plug.


After removing the plug wire you will see the actual spark plug.


Now use a spark plug wrench like below
-you may need to buy one for $3 or so bucks if you don't already have one on hand.


Take one of the ends, mine used the larger end, and slide it over the spark plug so that the hexagon shaped opening covers the hexagon shape around the edge of the spark plug.
 
You may need to lightly push it on to the plug.


Then insert the arm into one of the holes so you can push on it to start unscrewing the spark plug.


Once the spark plug is removed you will see the hole where the new spark plug goes.


Simply insert the LARGE end of the spark plug into the hole and turn to tighten it on.


Put  your spark plug wire back on the tip of the spark plug, and you are done!
 
 
(unless you want to also change the oil, which I did not need to do).


Congratulations!
 
You have now tuned up your lawn mower!
 
Now...........
 
Get your motor runnin'..............................and get that lawn mowed!!!!


Pin It 


Linking Up To:
Treasure Hunt Thursday
Do Tell Tuesday on Diane's Vintage Zest!Weekend re-Treat Link Party #69 | www.akadesign.ca TPB Party Bunch Link Up... Every Friday to Sunday link up your projects over at  theidearoom.net , thirtyhandmadedays.com , whipperberry.com or the36thavenue.com Four bloggers = ONE BIG PARTY! We can't wait to see your projects!WWDPARTY BUTTON
Inspire Me Please
Glitter, Glue & Paint
By Stephanie LynnBlog Hop Blank 5 bannerThe Dedicated HouseOne on sidebarbuttonPhotobucket

Monday, May 19, 2014

Tips for Painting a Popcorn Ceiling

Today I am going to share with you some tips for one of the most labor intensive paint projects one can tackle-  
painting a popcorn ceiling!
 
Of course I would prefer to ditch the popcorn but that would include a LOT of scraping, which of course could lead into even MORE repairs depending on what you might find when you start scraping.
 
So instead of scraping I decided to brighten up the ceiling with fresh paint.
 
To get started, you need some tray liners, painter's tape, special ceiling paint which I will talk about in a minute, and special paint rollers.


TIP:
Do NOT attempt this project without a special roller made for
rough surfaces!
These special rollers work on lumpy bumpy surfaces like a popcorn ceiling and keep you from smashing down the texture whenever you roll over it.
They have more dimples/indentations in their nap unlike the traditional paint rollers so they allow for more give as they roll over the rough surfaces.
 
These paint rollers come in different grades and for me the "GOOD" level was just fine, but you can opt for "BETTER" or "BEST" if you prefer. 
I just didn't think it was worth the extra money to do so.


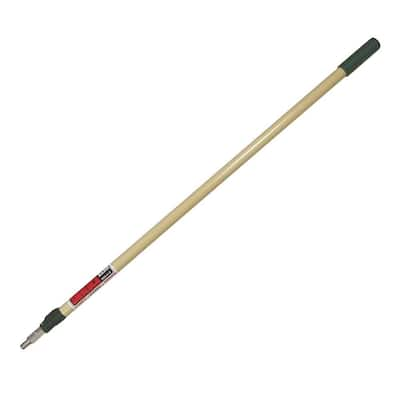
 You will also need one of these long extension sticks so that you can reach your ceiling, and of course ceiling paint.
 
Most of these extension sticks just screw on to your regular paint roller handle and extend to about 4 or 5 feet.
I could NEVER completed this project without the extension pole so I highly recommend it!
 
As for paint, I prefer to use paint specifically designed for ceilings,
but you can use any paint your little heart desires,
 and normally a flat paint works best.
 
 
Here is the paint I used:


Now, I suggest taping off your ENTIRE room.
 
ALL SURFACES should be covered since popcorn ceiling particles have a tendency to break off a little bit as you roll the paint roller across the ceiling and you will get little chunks of it EVERYWHERE,
 
along with an occasional paint drip too.
So spare yourself the pain and just tape it off before you get started.


You can see in these two pictures I have the room taped off from the molding down to the floor.
I simply bought plastic drop cloths and used painters tape to tape it up.
 
 
TIP:
To save time you can purchase plastic drop cloths that have the sticky stuff already on them so that all you have to do is peel and stick it on your wall.
 
This will save you a TON of time!


Once everything was taped off I started rolling on the paint.
 
The ceiling soaked up the paint so I had to dip my roller a lot which slowed down my process but once I got going I could start seeing how much cleaner and brighter it was starting to look and I loved it!


The original ceiling color was an off white color and for the last eight years I lived with it and did not realize how dingy it looked until comparing it to the new crisp white paint. Then it was very obvious!


TIP:
 
Because the paint roller is too large to get into the crevices where the ceiling meets the crown molding,
I got creative and used a sponge wheel that was really made for painting corners of walls,
but it worked perfectly for running along the wall against the molding.


Just simply roll your paint wheel into the paint tray and run it along the right angle of the wall and ceiling where the paint roller can not reach.


See, it works PERFECTLY! ....and SAVES YOU TIME!
 
If you had to use a brush along the entire perimeter of the room it would take FOREVER!


Here's my front room, about half done.....


Look how bright and clean it looks!
 
After the paint had some time to dry, everything started to look so much better!


Here are more pictures of my progress that show the difference in the color of the ceiling.


The light just bounces off the ceiling and the room looks so much better.


Pin It

I also took down those recessed lights and freshened them up with some spray paint as well so the entire ceiling looks so bright and white!
 
Ideally, every house should have a smooth, ceiling without popcorn, but if you have popcorn ceilings and want a quick and easy way to freshen them up, go ahead and paint them!
 
You can paint them any color you wish and besides basic painting supplies, you can do this without any special tools.
 
The hardest part about this project is the prep work and the fact you are painting a surface that is ABOVE you so your neck and shoulders will probably hurt after you are done,
but hey, its all worth it
when you see how it instantly updates your room!


Jennifer


Linking Up to These Great Parties:
http://www.thesitsgirls.com/diy/fun-crafts/


 10308754_10203781373763465_7536899127074402936_nDotellTuesdayMainHeaderWhat did you makeYour Whims WednesdayTreasure Hunt ThursdayThe-Casual-CraftleteTreasure Box Tuesday 20Saturday Party Banner Saturday ShowLicious Craft and Recipe Party LIVE! Inspire Me PleaseTiticrafty-Bewitch-me-LinkParty-400x4001