


Welcome to my renovated mudroom!
Yes, it took several months to get it all done since I was only working on it on the weekends.
But here is the BIG REVEAL! Yay! I am super excited to show you around so lets hop to it!
Here is the mudroom BEFORE changes were made.........
I have yellow walls in my front room and kitchen but the color never looked right in this room so I decided it was time to do a makeover and add a new color AND bead board wall paper.
(Go HERE to see my original post about the bead board wall paper).
.JPG)
So everything was taken out and I started with the first section of wall paper.
I debated on painting first but decided to save a few bucks on paint by wallpapering FIRST so I didn't have to paint the lower half of this wall.

Here is the picture with the bead board wall paper up and most of the room painted with the new color.

I chose a neutral, which I RARELY do, but we really needed to tone down the yellow color that was previously in there and this color looked so good with the floor tile and accessories that I couldn't resist it!
.JPG)
After the bead board wallpaper was up and fully dried, we added our boards to create a stacked moulding look.
At first I was intimidated by the different layers and sizes of wood to use to create this look but after playing around at HD for an hour or so, I knew exactly what I needed to buy!
.JPG)
Here is the moulding ledge half way painted.

And here it is after it was fully painted and up against the bead board wallpaper.

And another view of the small ledge with the bead board wallpaper.

On the other side of the room there is this wainscoting type of moulding on the wall.
This wall is the wall behind the fireplace and I believe this boxed area houses the chimney.
So after the walls and trim were painted, our fabulously talented friend added quarter round and new air vents for us.

The new vents were a PAIN IN MY BUTT to install because I have an old home and my vent holes are a different size than the standard size vent covers carried in most hardware stores.
I looked online, in specialty stores, and in the big box stores and nobody had my size so we improvised but were able to get the vents to fit.
(I have a future post scheduled to show you how we did it) :)


For accessories, I chose oil rubbed bronze. I know, you're shocked, right? LOL
I {LOVE} ORB and it looks great with the paint color so we have an OLB light fixture with frosted glass, and ORB door knob too.
(yes, I have popcorn ceilings.........don't be jealous!) :)


So that's it for changes, now lets see what all of this looks like in the AFTER photos.......
Here we are in my front room looking into the mudroom, so come on in.

To the right of the room is this little nook area where I added a thrifted bench that I painted in a neutral color that was a mistint from Lowe's.
On it I added a large jar of hydrangeas from my parent's yard, and a pillow from Tuesday Morning.
I love all the colors in this pillow and it was the only one they had so I bought it.
(The light blue in the pillow matches my little side table on the other side of the room)
....And next to the bench is a sea grass basket with some magazines and a crocheted blanket I got from a garage sale a few years back for a buck or two.
.JPG)

Here is another view of the bead board with brighter light.
The bench USED to be on this wall but I moved it to the adjacent "nook" wall to open the space and allow the bead board wallpaper to show itself.
.JPG)
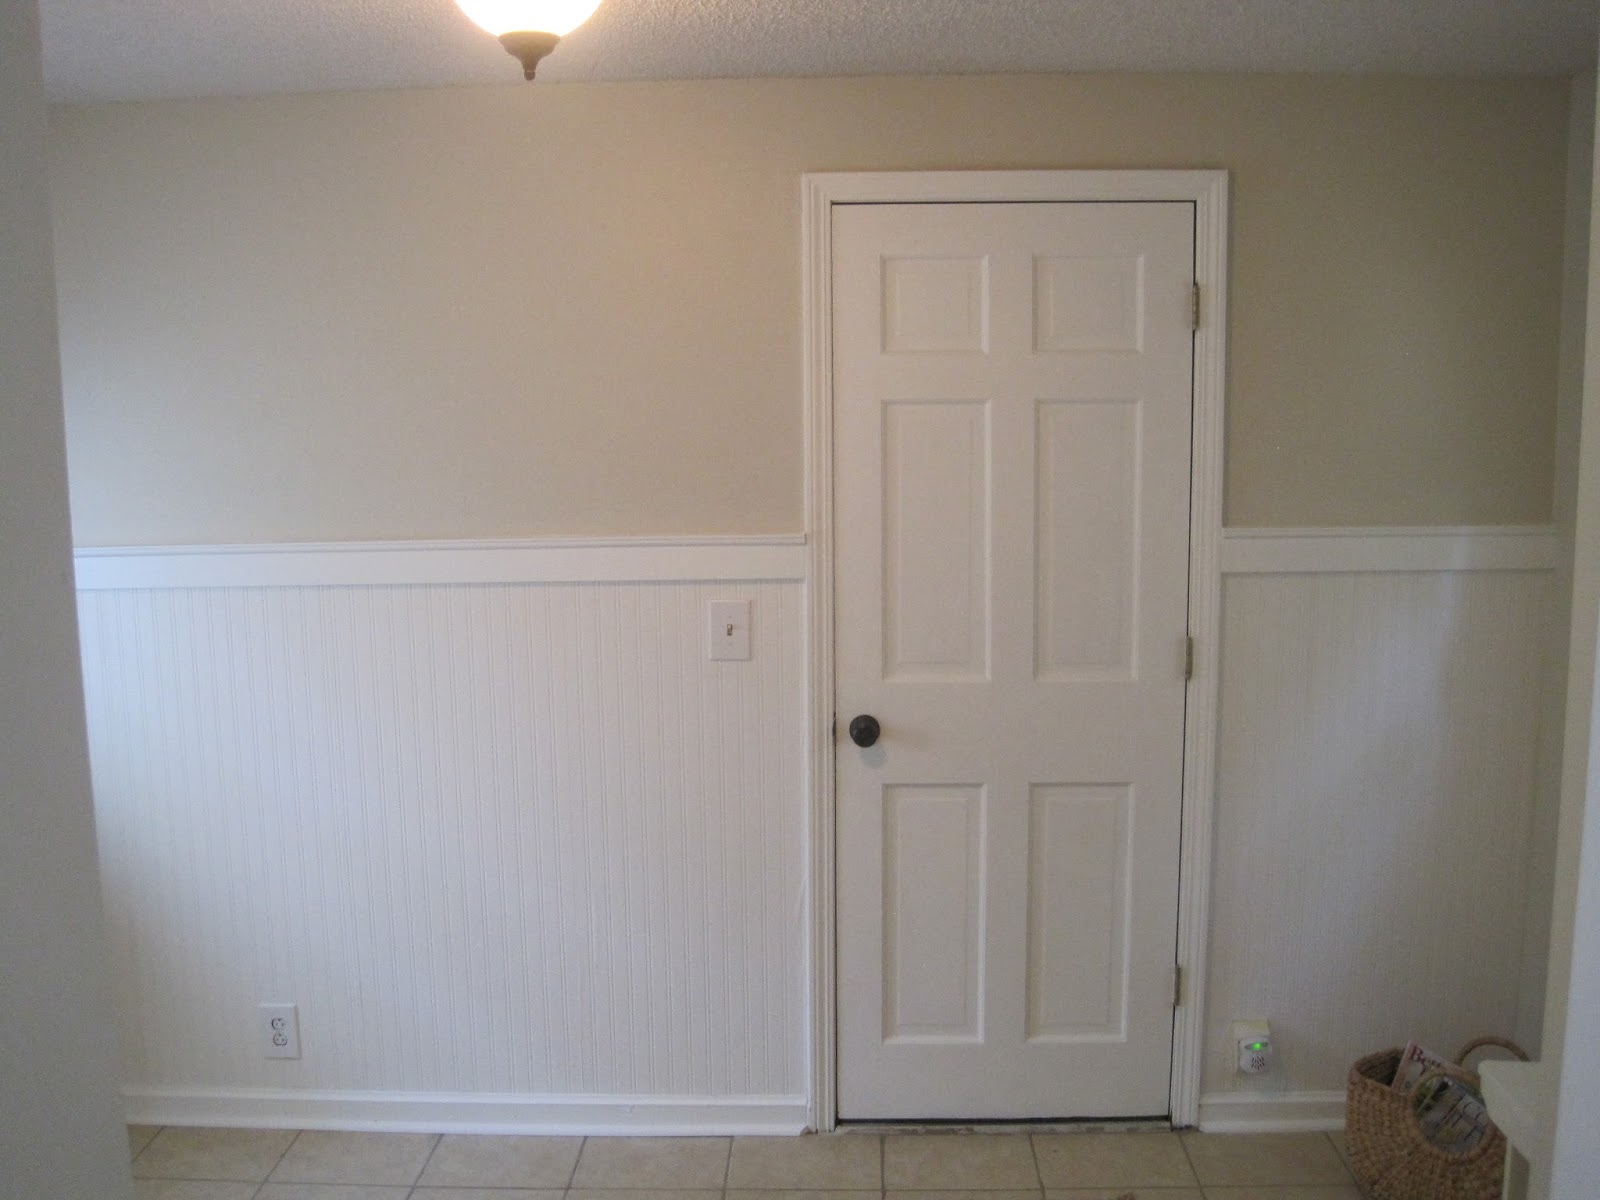
This is a really great picture that shows the paint color against the white of the moulding and bead board wallpaper.


Sorry for the bad lighting on this wall but you can see the bead board wallpaper better.
I am not a professional wall paper hanger so yes, you can slightly see a seam, but the wall paper is very forgiving.
It really blends right in and is camouflaged by the other stripes in the wallpaper.

Here is the same wall with some more light.
You can read about my little shabby table makeover HERE.
And remember that sea grass rug from THIS POST?

Well it was too big to put in there so it is staying in the living room, but I already had a smaller sea grass rug and I liked the way it looked in here.
It adds texture and color variation that really completes this space of neutrals.
And here is a raw picture of the entire wall after everything was done, but before all of the accessories were added.

Now, here is the comparison of the space
BEFORE & AFTER.
Color choice really made a difference in how this room looks.
The yellow was too overpowering in this room.
It needed something light and neutral and the white bead board wallpaper was just what the doctor ordered!!!

I had so much fun using this wallpaper.
It is very forgiving (you don't have to be perfect), and because it is white, it brightened up the room a LOT too!
I find it very thick and durable and I plan on using more of it around the house too.
.....it definitely is NOT the last time I will use it!!!
I must be honest when I say that I am so glad to have this project done!
Since we are selling the house I have decided not to hang up any pictures so the buyers can see the fresh paint job, so yes it is fully DONE, can you believe it?!?
Does that EVER happen? LOL :)


Have a wonderful week!
Jennifer
Linking Up To These Great Parties:


No comments:
Post a Comment
Your comments are greatly appreciated! I enjoy receiving your feedback.