Ok, it feels like I have been working on my dining room makeover FOREVER!
I started it in the spring when I gave it a new paint color and then when I began working on my table I got side tracked with yard work and all of my outdoor projects.
I know many of you can relate, right?
So here we are today and I finally have the table finished and ready to show you!
So here we go!
I bought this table off of Craigslist.
It was in great shape but the stain on top was a light oak and all wrong for my space so I gave it a makeover.
(the left side has been sanded and the right side is the original stain)

I used my electric sander to sand away all that oak stain and used the pointed tip to get inside the crevice around the table.
Using an electric sander made this job go SO much faster!
If you don't already have one, I highly recommend getting one.


I started with a rough sand paper on my sander to break up the stain then after most of the stain was off I went over the table with fine grit sand paper for a final "buffing" before applying my new stain color.
Here is the table top fully sanded and wiped clean.
I kind of like how pretty the raw wood looks.
I kind of like how pretty the raw wood looks.

However, I wanted a two toned look and knew I wanted to keep the base white but I wanted to top to be dark.
I also had to take in consideration that my dining room has hard wood floors.
Because of this, I decided to go for a darker stain that would be a contrast against the white trim and color of the wood floors, so I went with -
Kona by Rustoleum.

I applied the first coat of stain by rubbing it on with a rag.
Wow! What a difference from what was there before!

The first coat turned out a bit splotchy so I was a little worried, but moved forward with my second coat.
For the second coat I applied the stain with a paint brush made for oil based stains.
It gave a full coverage and went on beautifully!!!
For the second coat I applied the stain with a paint brush made for oil based stains.
It gave a full coverage and went on beautifully!!!
Here you can see the left side with the one coat and the right side with the second coat.
See the difference?!?!
The second coat made a BIG difference!

After waiting a week (only need to wait overnight)
I was happy with the stain and now it was time to apply the top coat.
You could stop here with just the stain, but I wanted my table to hold up to drinks and hot plates so I added a top coat using
Spar Urethane.

I applied the topcoat with this sponge brush.
This applicator is AWESOME and provides a smooth, streak-free finish!

This next step required me to step out of my comfort zone. After all, I stained the table and applied a top coat and most people would think to stop there but I was a pioneer and moved on to applying another top coat.
After the first coat dried thoroughly (can says 12-24 hours) but I waited a few days then I used this fine grit sanding block to LIGHTLY sand the top coat.

I know, you're probably thinking she's sanding that beautiful top coat? What's wrong with this lady?!
Well, lets keep going and she how this ends up.
Once you LIGHTLY buff over the top to break down the sheen, simply wipe it down with a soft cloth and apply another coat of the Urethane and let it dry THOROUGHLY!
Then you could stop there, but I sanded again and added a third coat just for an extra layer of protection and here is the end result.
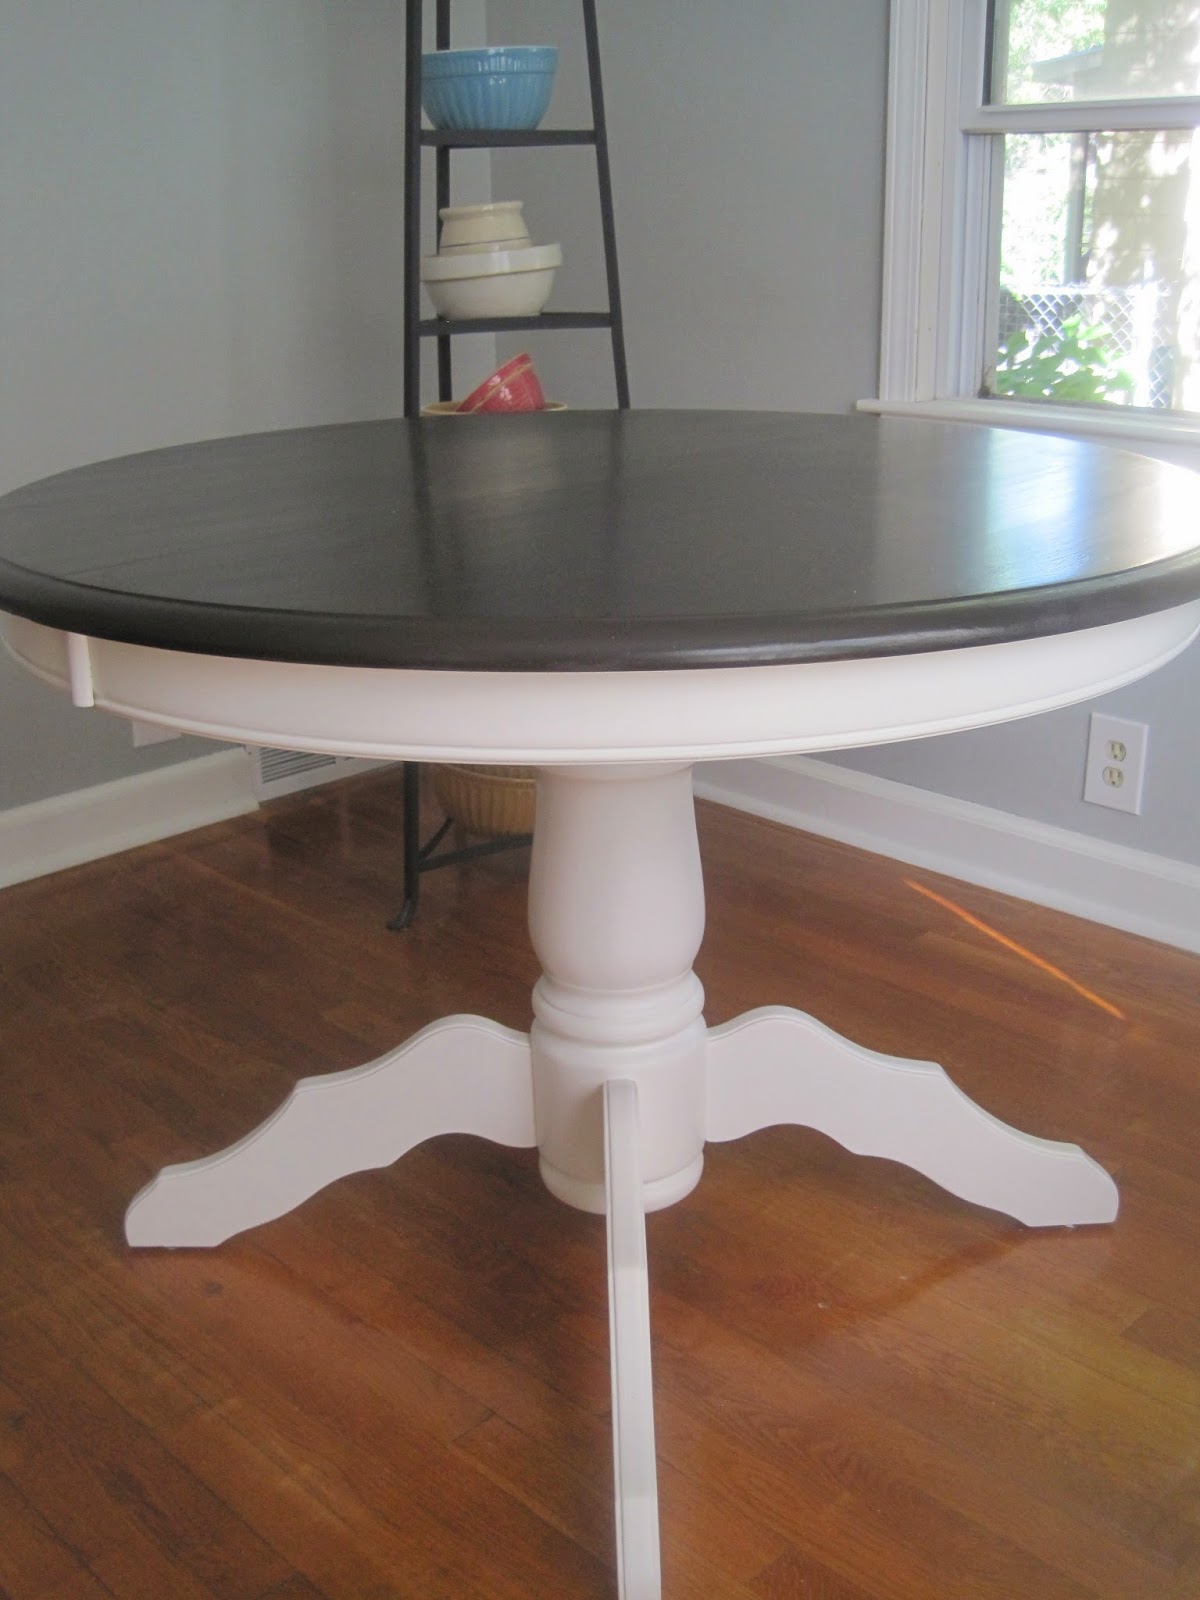
I love how rich the stain color looks and the top coat really gave it a finished look.
See how the light shines over the top?


Once I was done with the top I wiped everything down again and gave the base a quick coat of white paint just to freshen it up.

And now I can say I am almost done with my dining room!
I am happy to have this project done and I think it turned out great, so here are some tips if you are thinking about re-staining yours:
My tips for staining your dining room table are:
1.Go SLOW! Do not rush any of the steps and let the table cure before putting it back to regular use.
2.Protect your surrounding surfaces if working indoors. Its inevitable that you will drip or have a spill.
3. Use the right tools. If you are using oil based stain like I did, be sure to use brushes that are designed for oil based products.
4.Check to make sure the stain got into every crevice of the wood. This usually takes two coats of stain.
5.Work in a ventilated area if working indoors, but be careful of being close to a fan or draft. You don't want your stain or top coat to dry too fast. It needs to dry naturally and slowly. (IMO)
6.Use a paper plate under your stain can to catch drips.
7. Make long brush strokes and do not press hard. Gently glide the brush over the wood, and a little stain goes a long way!
8.When applying top coat apply a liberal amount with your brush. Unlike the stain, the urethane is a little thicker and if you do not have enough product on your brush it will be too thin and look streaky.
9.Before applying ANYTHING (stain or top coat) be sure that the surface is free of dust or fabric fibers. Always wipe the surface clean with a soft cloth as a prep before you get started.
Do you like the two toned look?
Jennifer
Linking Up To These Great Parties: