
Hello everyone! A little over a week ago I posted about how I was tired of the snow and ready for Spring. It was the last week of February and I had already started updating our home with touches of Spring decor. You read all about my Spring entryway area HERE and see more pics.
One of my Spring pieces is an urn filled with moss covered orbs. (aka moss balls) :)
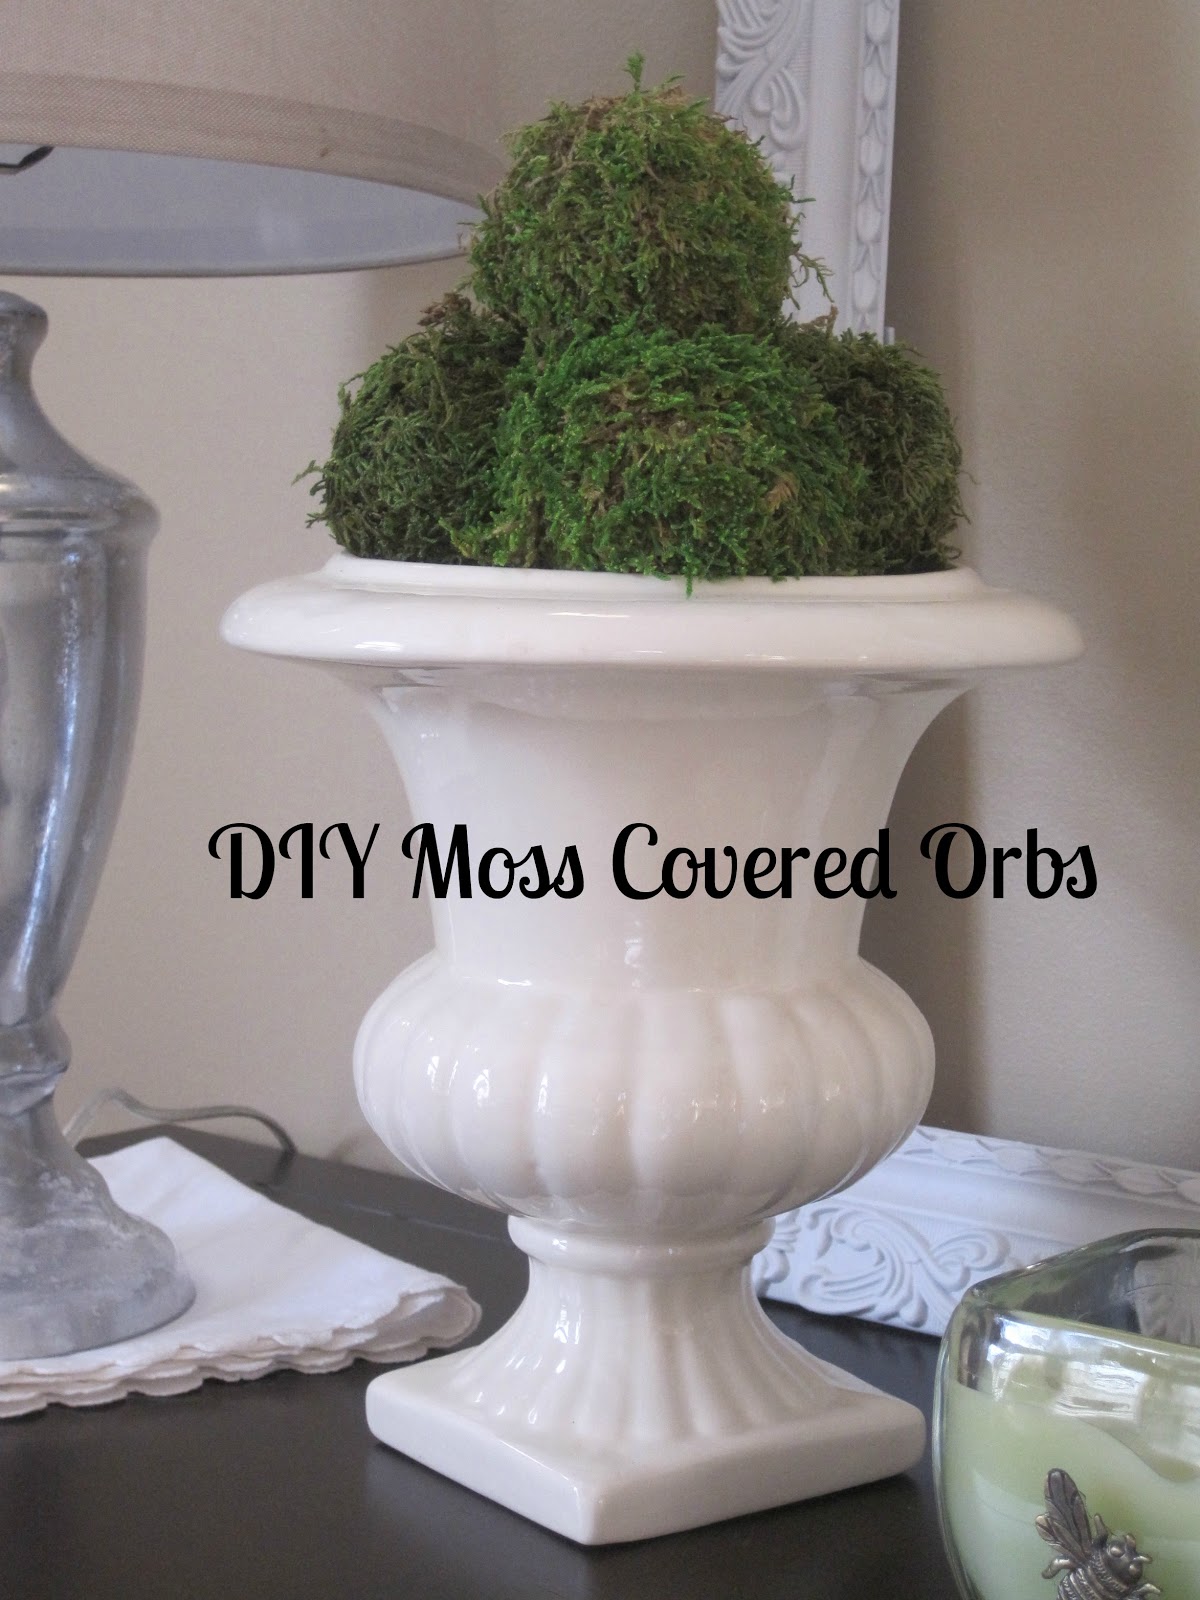

I get a lot of compliments and questions about them so I decided to post the tutorial on how to make these guys. They are extremely easy so even the newest DIYer can do this!
Heck, even your kids can help make these!
For starters you need to buy moss. I personally like this sheet moss from Hob Lob. It runs about $6-8 bucks and you can always use the 40% off coupon from their website and get it even cheaper!
.JPG)
Then you will need something as your round object to cover. I buy Styrofoam balls from the dollar stores, or craft stores, but you can also use anything round! Seriously!
Don't be afraid to get creative and resourceful because remember, nobody will see what is UNDER the moss anyways!
So take your round object, for me it was a Styrofoam ball, and brush on a liberal coating of Mod Podge like I did below.
.JPG)
Then simply take sheets of the moss and wrap it around the ball and cup your hand around it pressing firmly for a few seconds until the Mod Podge attaches to the moss.
.JPG)
.JPG)
This is a messy job so be sure to have a wet paper towel handy to keep your fingers clean from the moss sticking to them!
After you finish each one, set them aside on a paper towel to dry. The paper towel catches any lose pieces of moss that flake off.
.JPG)
They will dry within an hour or so, but I made mine in the evening and let them dry out over night then I used them to decorate with the next morning.
Here is what they look like up close. See the variations of color and how fresh they look? I really love decorating with the moss in the Spring time!
.JPG)
And here is the finished product! Put these in an urn and you have a high end designer look without the price tag!
.JPG) |
|
This is one project that is super easy and is so worth it to do yourself to get the look for less. I've seen these moss covered orbs at places like TJMaxx, Home Goods, etc. for a a lot more than what you can pay to make them yourself!
To keep your mossy orbs clean and in good shape to use year after year, I suggest storing them in an unzipped plastic bag. I made some fresh ones a couple weeks ago but also used some that I had from last year, and they are holding up fine.
To keep your mossy orbs clean and in good shape to use year after year, I suggest storing them in an unzipped plastic bag. I made some fresh ones a couple weeks ago but also used some that I had from last year, and they are holding up fine.
Now that you know how easy it is to make these, think of all the other things you can make with the moss. The possibilities are endless!
I hope you enjoyed this tutorial and are able to give it a try!
Jennifer
Linking Up to These Great Parties:


Your Orbs look fantastic!
ReplyDeleteThis are great..thanks for the tutorial. Yes, the ones on sale are so expensive too!! I will definetelly try your idea. Have a wonderful week.
ReplyDeleteFABBY
Cute! Very cool idea!
ReplyDeleteSuper clever, and very springy
ReplyDeleteStopping by from Liz Marie's Hop To It Party :-)
I am definitely going to make some of these. They are perfect for spring/summer and look so pretty in the urn. I can also picture them in a cloche or bowl.
ReplyDeleteLov'n these...shucks my brain is reel'n,I could do larger ones for topiary outside at front door.Thanks for sharing.Saw you @ Creative Cain Cabin.
ReplyDeleteSuch a great idea! I am going to do this really soon!! I pinned them for later and would love if you could link these up at my linky party Thursday at http://www.juliakendrick.com! I hope to see you there!
ReplyDeleteOH this is so great for spring! Thanks for the inspiration :) Visiting from Thrifty 101.
ReplyDeleteAs always...WONDERFUL!!! hugs...
ReplyDeleteThank you Andrea....I'm glad you like!
ReplyDeleteAnd Melanie thank you too and and welcome aboard! :)
and Jo-its nice to meet you.
So cute! I love Hobby Lobby's coupons! Can't wait to try these!
ReplyDeleteSo cute and springy! I love how they turned out. I'll be featuring them on my party highlight post. Thanks so much for stopping by Crafty Tuesday and linking up.
ReplyDeleteSo cute! Thanks for sharing at my Twirl & Take a Bow Party! Stop by tomorrow to see them featured. Be sure to grab a "featured" button too.
ReplyDeleteLeslie
House on the Way
Super cute~ thanks for linking up at It's a Spring thing!
ReplyDeleteThank you for sharing! I'm going to pin this.
ReplyDeleteSo fresh and pretty! Thank you for sharing this at my Make it Pretty Monday party at The Dedicated House. Hope to see your prettiness again on Monday. Toodles, Kathryn @TheDedicatedHouse
ReplyDeleteLove these! I am addicted to moss covered everything after I made some of these recently. They look great.
ReplyDelete